REVIEW · REYKJAVIK
Small-Group Ice Cave Tour from Jökulsárlón
Book on Viator →Operated by Glacier Trips · Bookable on Viator
Blue ice and crampons beat most Iceland tours. I love how the guides lead you safely into a naturally shifting ice cave on Vatnajökull, and I love the small-group feel that makes the walk and photos feel personal. One drawback to plan for: the exact cave and route can change day to day with conditions.
You start near Jökulsárlón, then transfer toward Fláajökull for the gear-up. You’ll get a helmet and crampons, and you should expect uneven footing, low spaces where you’ll duck, and only 30 to 40 minutes inside the cave.
In This Review
- Quick hits
- Vatnajökull Ice Caves From Jökulsárlón: What Makes This Tour Special
- Getting There: The Jökulsárlón Start and the Short Drive to the Glacier
- Gear-Up for Fláajökull: Helmets, Crampons, and Headlights
- The Hike Across the Ice: What the 1-Hour Walk Really Means
- Inside the Ice Cave: 30 to 40 Minutes of Blue Ice and Clever Photo Tips
- Shared Space, Small Group Care: How Guides Manage Crowds
- Route Changes and Weather Reality: When the Cave Plan Shifts
- Timing and Effort: The 2.5 to 3 Hours Loop That Fits a South Coast Day
- Price and Value: Is $188 Worth It?
- Who Should Book This Ice Cave Tour (and Who Should Rethink It)
- Should You Book This Ice Cave Tour?
- FAQ
- What is the duration of the Small-Group Ice Cave Tour from Jökulsárlón?
- Where does the tour start and end?
- How large is the group?
- What does the tour include?
- Are hotel pick-up and drop-off included?
- How much time do you spend inside the ice cave?
- Is the route and cave guaranteed to be the same every day?
- Is the tour only in English?
- What happens if the ice cave is not accessible due to conditions?
- What should I bring for the tour?
Quick hits
- Vatnajökull + Fláajökull setting: You’re hiking on Iceland’s big, living ice system, not a static “theme cave.”
- Small-group cap: Maximum of 12 travelers, which helps when the cave is popular.
- Short cave time, big payoff: Plan on 30 to 40 minutes inside, so bring your camera mindset early.
- Photo-friendly guidance: Guides actively help you find angles and keep you moving safely.
- Route varies with access: The guide chooses the best and safest cave each day.
- Real glacier feel: Expect crampons, a bumpy drive, and a walk with elevation gain.
Vatnajökull Ice Caves From Jökulsárlón: What Makes This Tour Special
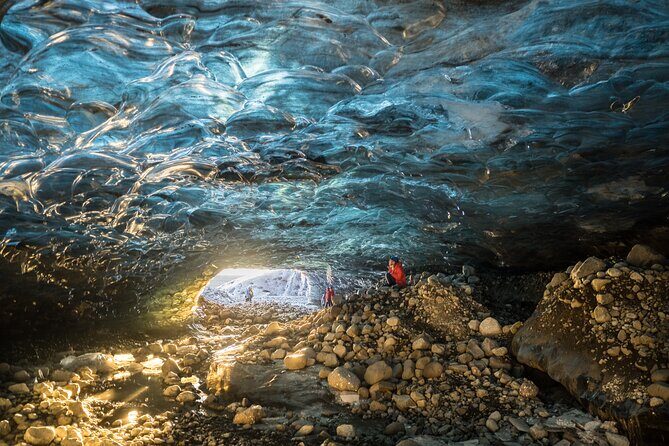
This is one of those Iceland tours that sounds simple, until you’re standing on glacier ice looking up at blue walls that feel too unreal to be real. The main draw is the combo: Vatnajökull National Park setting, a guided crossing across glaciated terrain, and then a naturally formed ice cave where the colors come from the way light travels through ice.
I also like the pace here. With a small-group size (maximum 12), the guide can manage the flow without rushing you every step of the way. That matters because ice caves are physically awkward places—people need time to reposition, duck, and get steady footing.
The other thing I appreciate is that you’re not promised the same cave every day. The guide selects the best and safest ice cave based on accessibility and weather, which is honest and practical. If you’re hoping for a specific “Instagram cave” shape, you may not get the exact same layout twice—but you’ll get a real glacier experience.
You can also read our reviews of more tours and experiences in Reykjavik.

Getting There: The Jökulsárlón Start and the Short Drive to the Glacier
You begin at Jökulsárlón, then you’ll drive to the Vatnajökull National Park area where the glacier hike begins. The information provided notes a meet point around Hólmur and a short 9 km drive to the base area near Fláajökull, so expect some transferring before you’re actually on ice.
This start is part of the value. You’re already in the south coast area with glacier views nearby, so the whole day doesn’t feel like a detour. Some people also like knowing that the ride isn’t only a means to an end; it’s time to watch the scenery shift from lagoon views to wider glacier country.
One practical note: the ride can feel rough. If you’re prone to motion sickness, plan ahead. Iceland roads in these areas can be bumpy, and you’ll be happier if you’re not fighting your stomach while trying to enjoy the views.
Gear-Up for Fláajökull: Helmets, Crampons, and Headlights
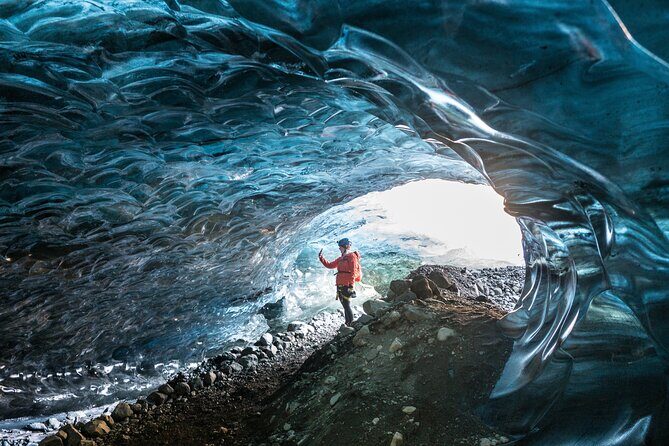
Once you reach the glacier base area, you’ll get crampons and a helmet, plus headlights. The goal is straightforward: keep you stable on ice and safe inside the cave. You don’t need to bring technical equipment, which is a big relief if you’re packing light for a multi-day trip.
In the cave, headlamps can be useful, but it’s also a place where lighting choices change the experience. One guide named Laura (from experiences shared by past guests) gave clear photo advice about using your phone flashlight for the look and feel, rather than turning on headlights everywhere. Even if you use headlights, it helps to follow your guide’s lighting cues so your shots (and everyone else’s visit) don’t get chaotic.
Your job as a traveler is simple: listen during the gear check, stand still while the crampons are fitted, and move slowly on the first minutes. Crampons feel awkward until you shift your weight and shorten your step a little. You’ll pick it up fast, but don’t rush the early part.
The Hike Across the Ice: What the 1-Hour Walk Really Means
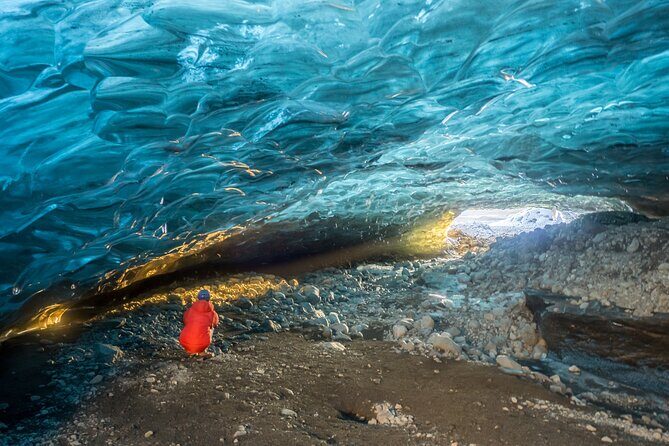
The walk portion takes about an hour with roughly 160 meters of elevation gain, and it’s on glaciated terrain. That doesn’t make it a “hardcore” hike, but it does mean you’re on uneven ice and gravel with a surface that changes as you move. Expect your footing to demand attention.
The most common physical moment you should plan for is low passages. Many cave spaces ask you to duck with your whole body, not just your head. Reviews also mention looking up and down constantly to avoid slipping on loose gravel and rocks, so this is not a “walk and daydream” activity.
The good news is that the guide controls the pace. Past guides have been described as attentive to safety while still making it fun, which is exactly what you want when everyone is learning how to walk on crampons. If you’re even a little unsure about balance, tell the guide early. They’ll generally place you where you can follow comfortably.
And yes, you’ll hear glacier facts along the way. The commentary covers geology and how these ice caves develop over time. That background adds meaning to what you’re seeing, because you start to connect the blue ice and cave chambers to melt, pressure, and seasonal change.
Inside the Ice Cave: 30 to 40 Minutes of Blue Ice and Clever Photo Tips
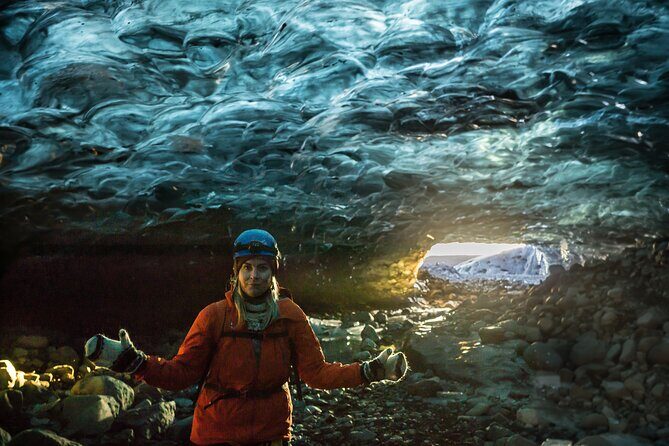
You’ll spend about 30 to 40 minutes inside the ice cave. That time can feel short at first, but it’s designed around safety and crowd flow. You’re not meant to wander alone; you’re guided through sections and photo stops.
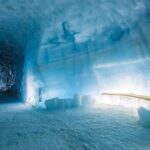
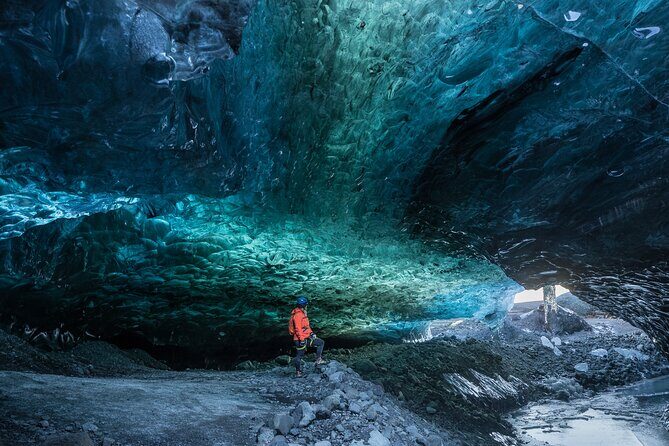
What you’ll see is typically stunning: blue crystal tones, frozen water details, and ice formations that look almost sculpted. In some visits, travelers described bubble-like textures and chamber-style areas—so plan for the cave to have “rooms,” not just one tunnel.
Because the cave is naturally formed, it can be visually different depending on season and weather. Some caves may look smaller from the outside but open up once you’re inside. Other times, a cave might be flooded or less accessible, and the guide selects an alternative cave if needed.
Photographically, here’s what I’d do if you want better results with less stress:
- Keep your camera ready before you enter, so you’re not fumbling.
- Move when the guide moves; that helps you capture the cave as it opens up.
- Expect to shoot at odd angles because low ceilings and ice walls force you to reposition.
Also, remember the cave gets shared. Your tour may overlap with other small groups from other companies, so you’ll want to be flexible and quick when the guide signals a photo stop. The best visits aren’t about everyone having the exact same photos—they’re about taking what the cave gives you, safely and on time.


Shared Space, Small Group Care: How Guides Manage Crowds
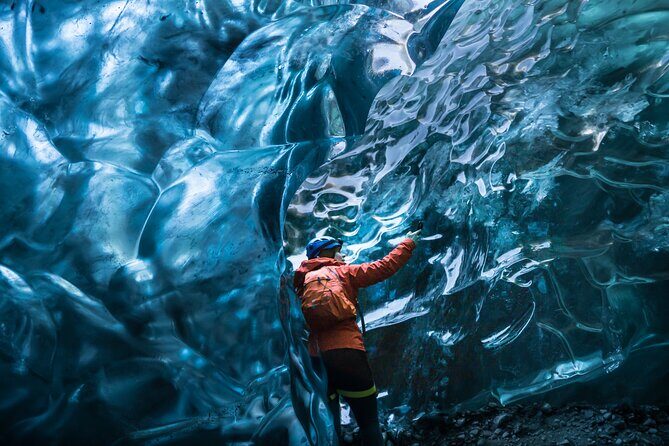
Even with a maximum of 12 travelers, the cave itself can have multiple groups at once. That’s normal in peak season, and it’s why the guide’s job is more than pointing out pretty ice.
Where this tour shines is how the guide keeps you moving without making it feel like a conveyor belt. Past experiences mention guides helping with photo composition, holding the group together through narrow sections, and answering questions without making you feel rushed. Names that came up include Laura, Alex, Robert, and Sindri, and guests praised them for being safe-first while still entertaining.
If you get claustrophobic easily, this matters. Several accounts mention guides who made sure people were supported through the cave. That usually means small adjustments: slower pacing, extra reassurance, and practical routing within the cave.
One more real-world detail: the “outside entrance” might not look like much. Reviews describe situations where the cave looked like a mountain or a small opening, and then inside it turns into something much bigger than expected. That surprise is part of the magic, but it also means you should avoid judging the cave by the parking spot view.
Route Changes and Weather Reality: When the Cave Plan Shifts
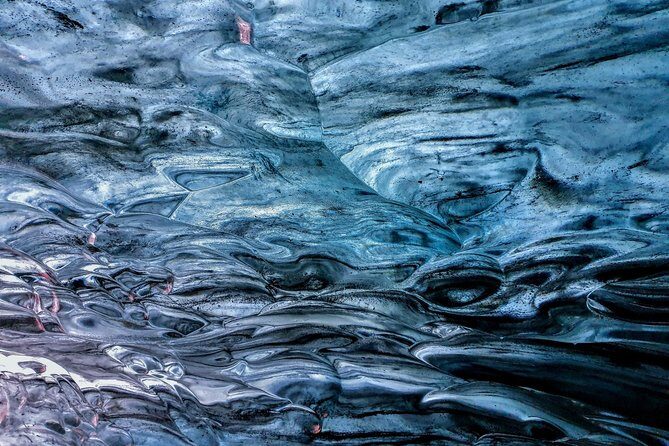
Ice caves are weather-dependent. You’re dealing with freeze-thaw cycles, melting, and access conditions. That’s why the tour says the route and cave may vary daily, and the guide chooses the best and safest cave.
Sometimes that means you might visit a different cave than expected because the main option is flooded or not accessible. Other times the hike approach may vary based on conditions at the ice surface. The key point is: the tour isn’t pretending the glacier is predictable.
Weather also affects whether the tour runs at all. The experience requires favourable weather, and if it’s canceled due to poor weather, you’ll be offered an alternative date or a full refund. I like this approach because it’s better than pushing people into unsafe conditions just to keep a schedule.
If you’re the type who hates plan changes, set your expectations now. This is Iceland. Think of it as glacier weather theater—except the “stage” is real ice, and safety comes first.
Timing and Effort: The 2.5 to 3 Hours Loop That Fits a South Coast Day
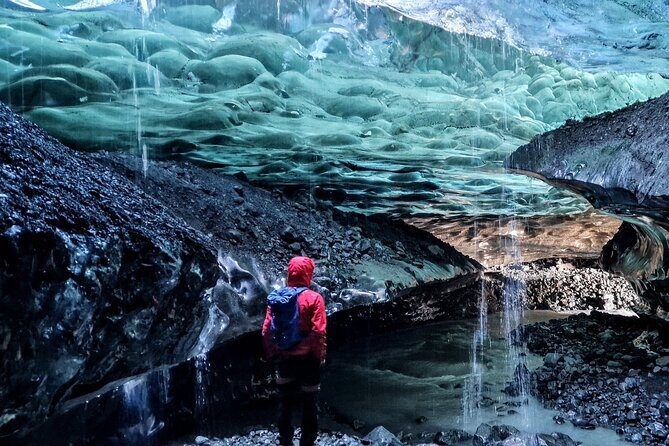
The tour is listed at about 2 hours 30 minutes, roughly 2.5 to 3 hours depending on weather and cave location. That’s usually a good length for a day on the south coast, because it’s not so long that it eats your whole schedule, but it’s long enough to feel like you actually did something.
Here’s how the time tends to break down:
- Transfer time from the meeting area to the glacier base.
- Gear-up and instruction.
- Around an hour of walking across glaciated terrain.
- 30 to 40 minutes inside the ice cave.
- Return drive back to the starting area.
The one thing to watch is that on days when access is trickier, the total time can stretch a bit. A few experiences described a longer overall duration, so build in some flexibility around this booking.
Effort-wise, you’ll be standing, walking, and ducking. If you can handle a firm walking pace on uneven surfaces and you’re willing to move carefully, you’ll be fine. If your shoes don’t grip well, you’ll feel it immediately—one story described people being rerouted to a closer cave due to improper footwear, so you want to avoid that hassle.
Price and Value: Is $188 Worth It?
At $188 per person, this isn’t a cheap thrill. But it’s also not “just a photo stop.” You’re paying for guided ice walking, plus the safety equipment that makes it possible to do this without bringing technical gear of your own.
What you get included:
- Professional guide/driver
- Helmets, crampons, headlights
- All fees and taxes
What you don’t get:
- Hotel pickup/drop-off
- Meals or drinks
- Clothing/shoes (you provide your own)
- Gratuities (optional)
So the value question comes down to whether you want the guide doing the hard parts: finding a safe cave, managing the route, and keeping you moving through awkward ice spaces. In my view, that’s exactly what you want here. A glacier isn’t a place to freestyle.
Also, the small-group size helps justify the price. If you end up in a group of 12, you’re more likely to get time for questions and better photo positioning than in bigger operations. And because the ice cave varies, you’re not just paying for a repeatable landmark—you’re paying to access a living, changing environment.
Who Should Book This Ice Cave Tour (and Who Should Rethink It)
This tour is best for you if you:
- Want a guided glacier walk with safety gear provided
- Like photography and want help timing your shots inside the cave
- Prefer small groups over big crowds
- Are okay with a changing plan depending on weather
You might want to rethink it if:
- You don’t do well with uneven footing or you’re not comfortable in low spaces
- Your footwear doesn’t give solid traction
- You expect the exact same cave every time (the tour explicitly says caves and routes vary)
If you’re going in winter or shoulder season, you may get a calmer feel than summer, though the cave can still be popular when tours overlap. Either way, go in with flexible expectations and you’ll enjoy it more.
Should You Book This Ice Cave Tour?
I’d book it if your goal is a real Vatnajökull ice cave experience with guidance, gear included, and a small-group pace. The short cave time forces focus, but it also helps you keep the visit safe and not dragged out.
If you’re on the fence, here’s the decision shortcut: if you’re willing to dress for icy walking and follow the guide’s instructions, this is one of the most memorable “wow” experiences you can do on the south coast.
Just don’t treat it like a casual stroll. Bring grip, expect ducking, and plan to be patient with nature’s schedule. When it works, you’ll come away with ice colors and formations that stick in your mind.
FAQ
What is the duration of the Small-Group Ice Cave Tour from Jökulsárlón?
It’s listed at approximately 2 hours 30 minutes, depending on weather conditions and cave location.
Where does the tour start and end?
The tour starts at Jökulsárlón and ends back at the same meeting point.
How large is the group?
The tour has a maximum of 12 travelers.
What does the tour include?
It includes a professional tour guide/driver and helmets, crampons, and headlights, plus all fees and taxes.
Are hotel pick-up and drop-off included?
No. Hotel pickup and drop-off are not included.
How much time do you spend inside the ice cave?
You’ll have about 30 to 40 minutes inside the cave.
Is the route and cave guaranteed to be the same every day?
No. The route and cave may vary daily depending on conditions, and guides select the best and safest ice cave.
Is the tour only in English?
Yes, the tour is offered in English.
What happens if the ice cave is not accessible due to conditions?
The operator offers alternatives, and you’ll be refunded the price difference between activities.
What should I bring for the tour?
The tour information says clothing and shoes are not included, so you should bring appropriate footwear and clothing for icy conditions. Meals and beverages are also not included.